
How to Build an Outdoor Rink (A Complete Backyard ODR Guide)
Step-by-step instructions, tips, and everything you need for your best winter yet.
Building an outdoor rink is one of the most rewarding DIY projects you can tackle in the winter. Whether you’re setting up a rink for hockey, family skating, or making memories in the backyard, the process is completely doable with the right plan, tools, and timing. In this guide, I’ll walk you through how I build my O.D.R. each year—from finding the right location to flooding, maintaining ice, and everything in between.
Let’s build your outdoor rink — Project O.D.R.
Step 1: Choose and Prepare the Right Rink Location
The first step in building a backyard rink is selecting a flat, open area. A level base freezes faster, uses less water, keeps boards from getting weighed down on deep side or not enough water on shallow side and keeps your liner safe. For my rink, I originally had over six feet of slope to manage, so the first two seasons involved significant dirt work and leveling to get the area ready for an O.D.R.
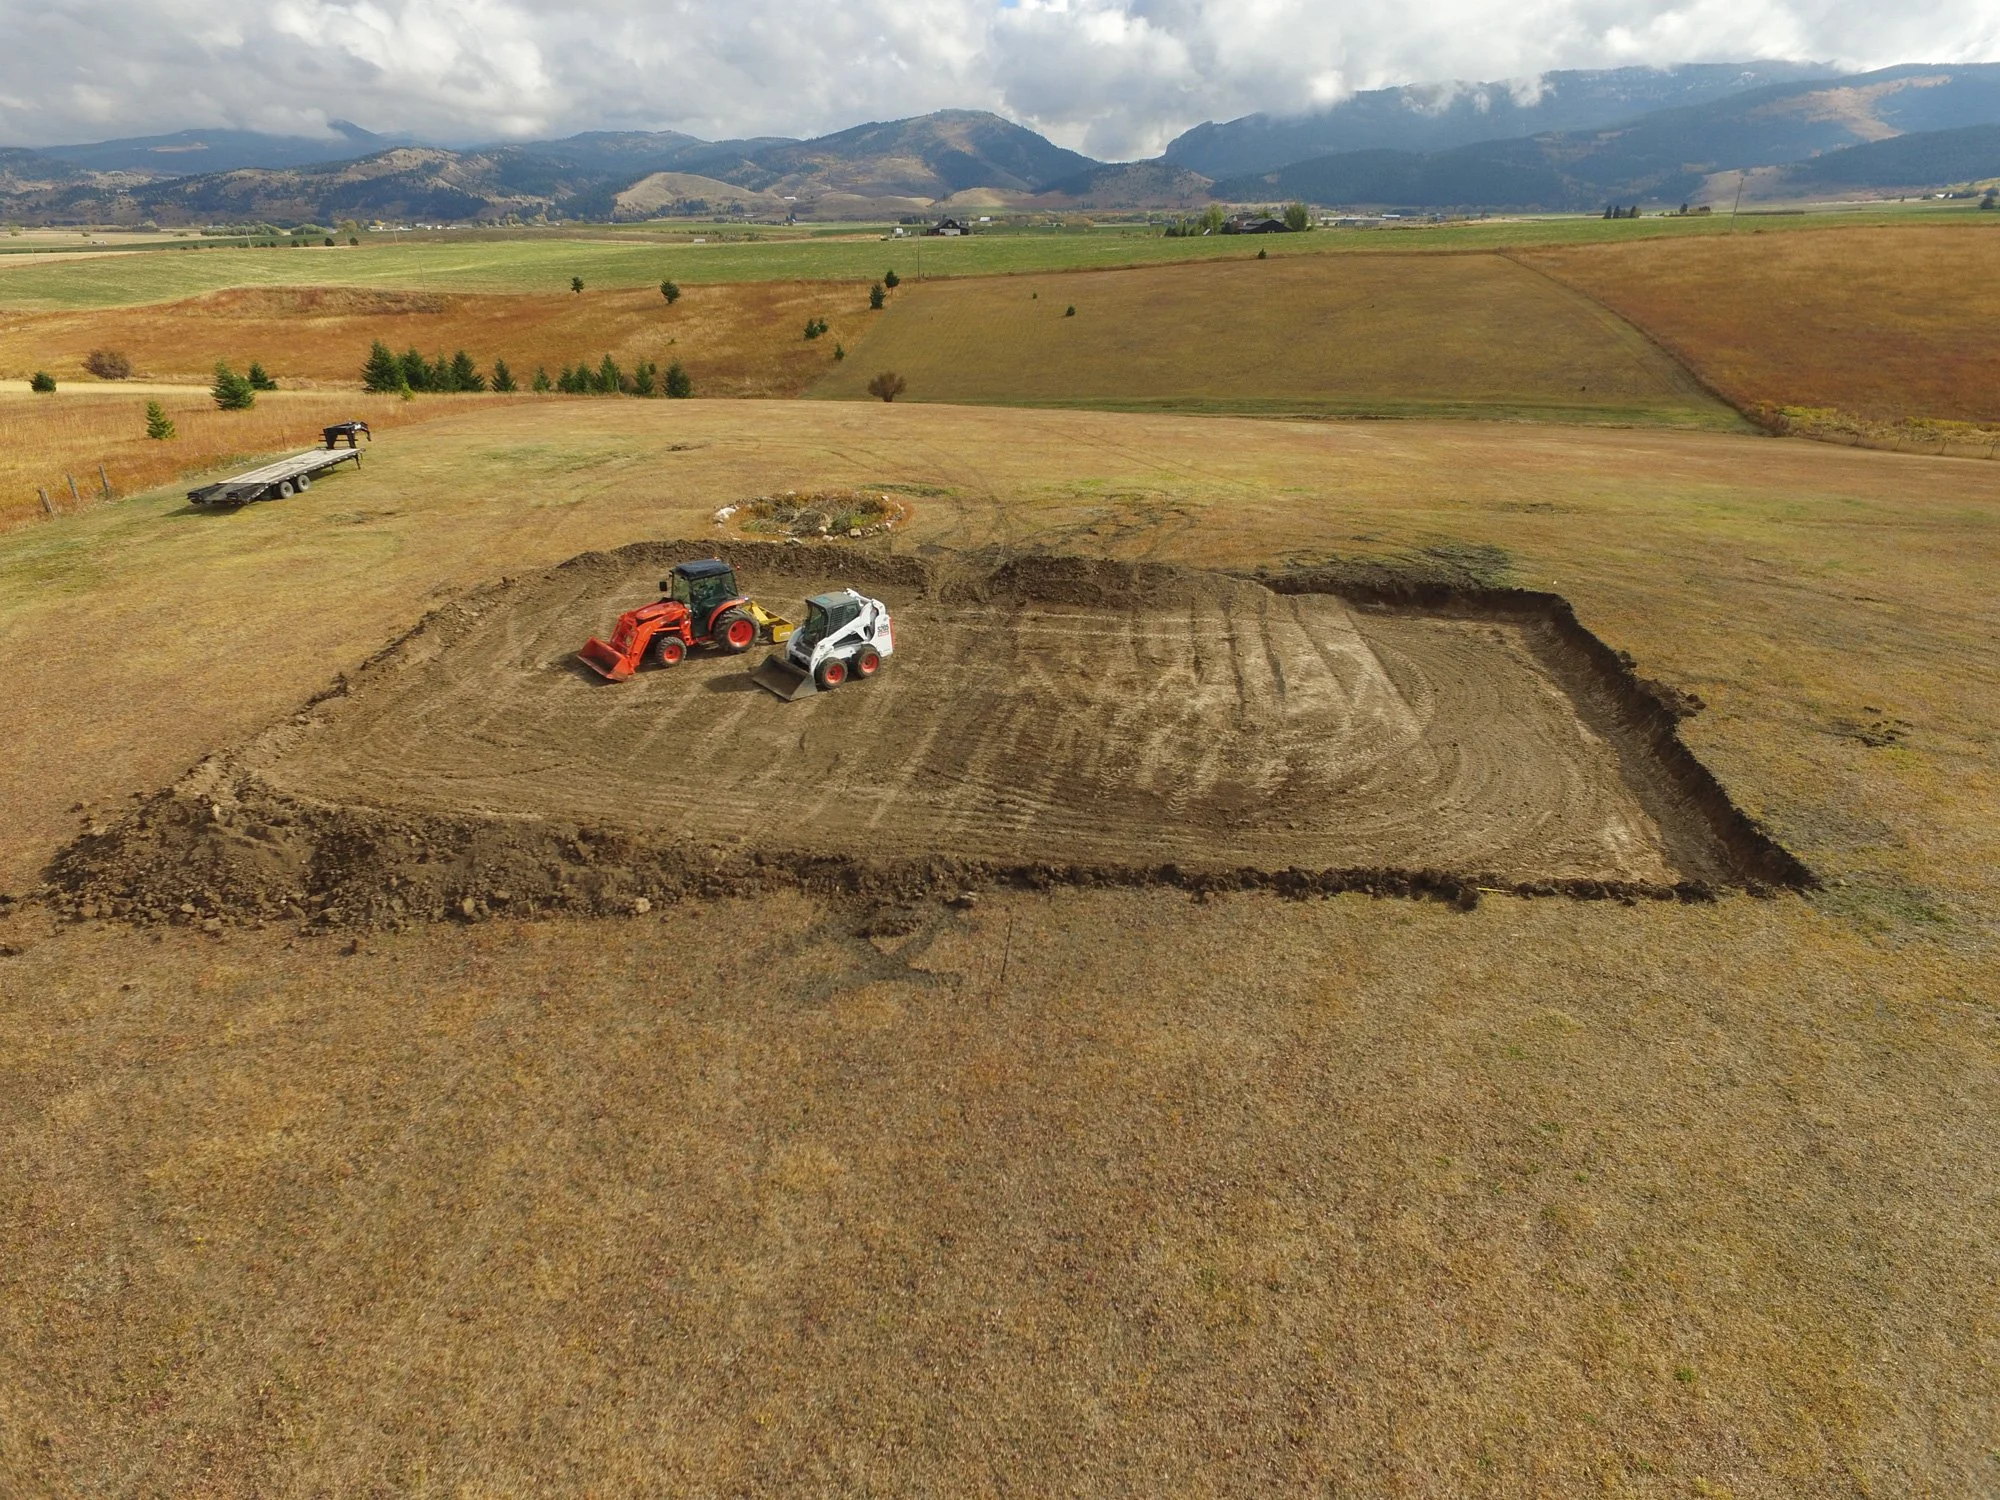
Buddies volunteered with equipment to help level the rink area.
What to look for:
An open, flat area.
Good drainage (avoid spots where water pools)
Sun exposure—shade helps your ice last longer
Space for boards, walkways, and shoveling
Step 2: Measuring and Squaring Your Rink
Once the area is prepped, it’s time to measure and square your rink. This ensures your boards line up evenly and your liner fits correctly.
How to square your rink:
Stake your starting corner — This establishes your first point.
Measure the length and width — My current rink is 88' x 44', but use the size that fits your yard.
Use the diagonal method — Measure corner-to-corner across the rink. When both diagonal measurements match, the rink is perfectly square.
Mark your layout — Use mason’s line or string and spray paint to outline your rink edges.
Pro Tip: Bright marking paint is a huge time-saver when placing boards.
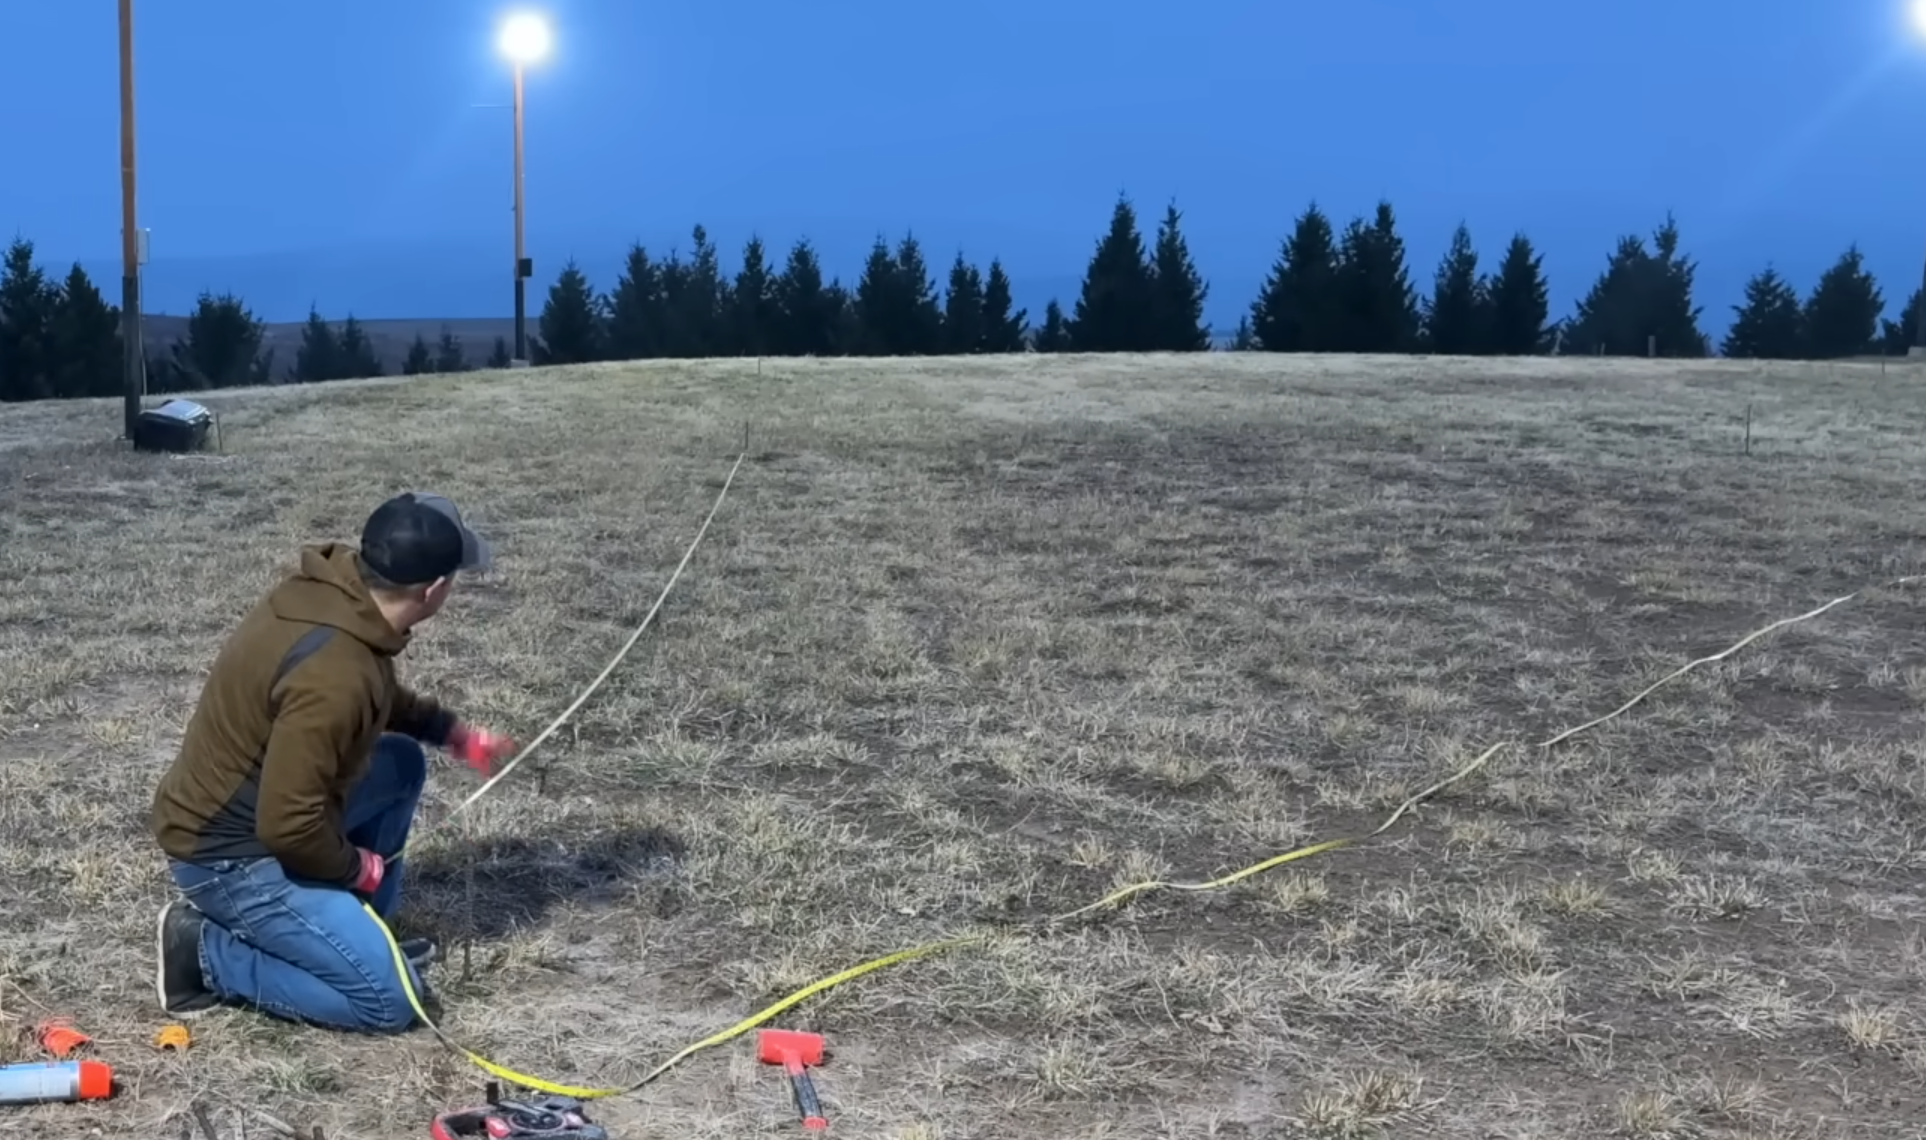
Measuring and marking the rink for correct size
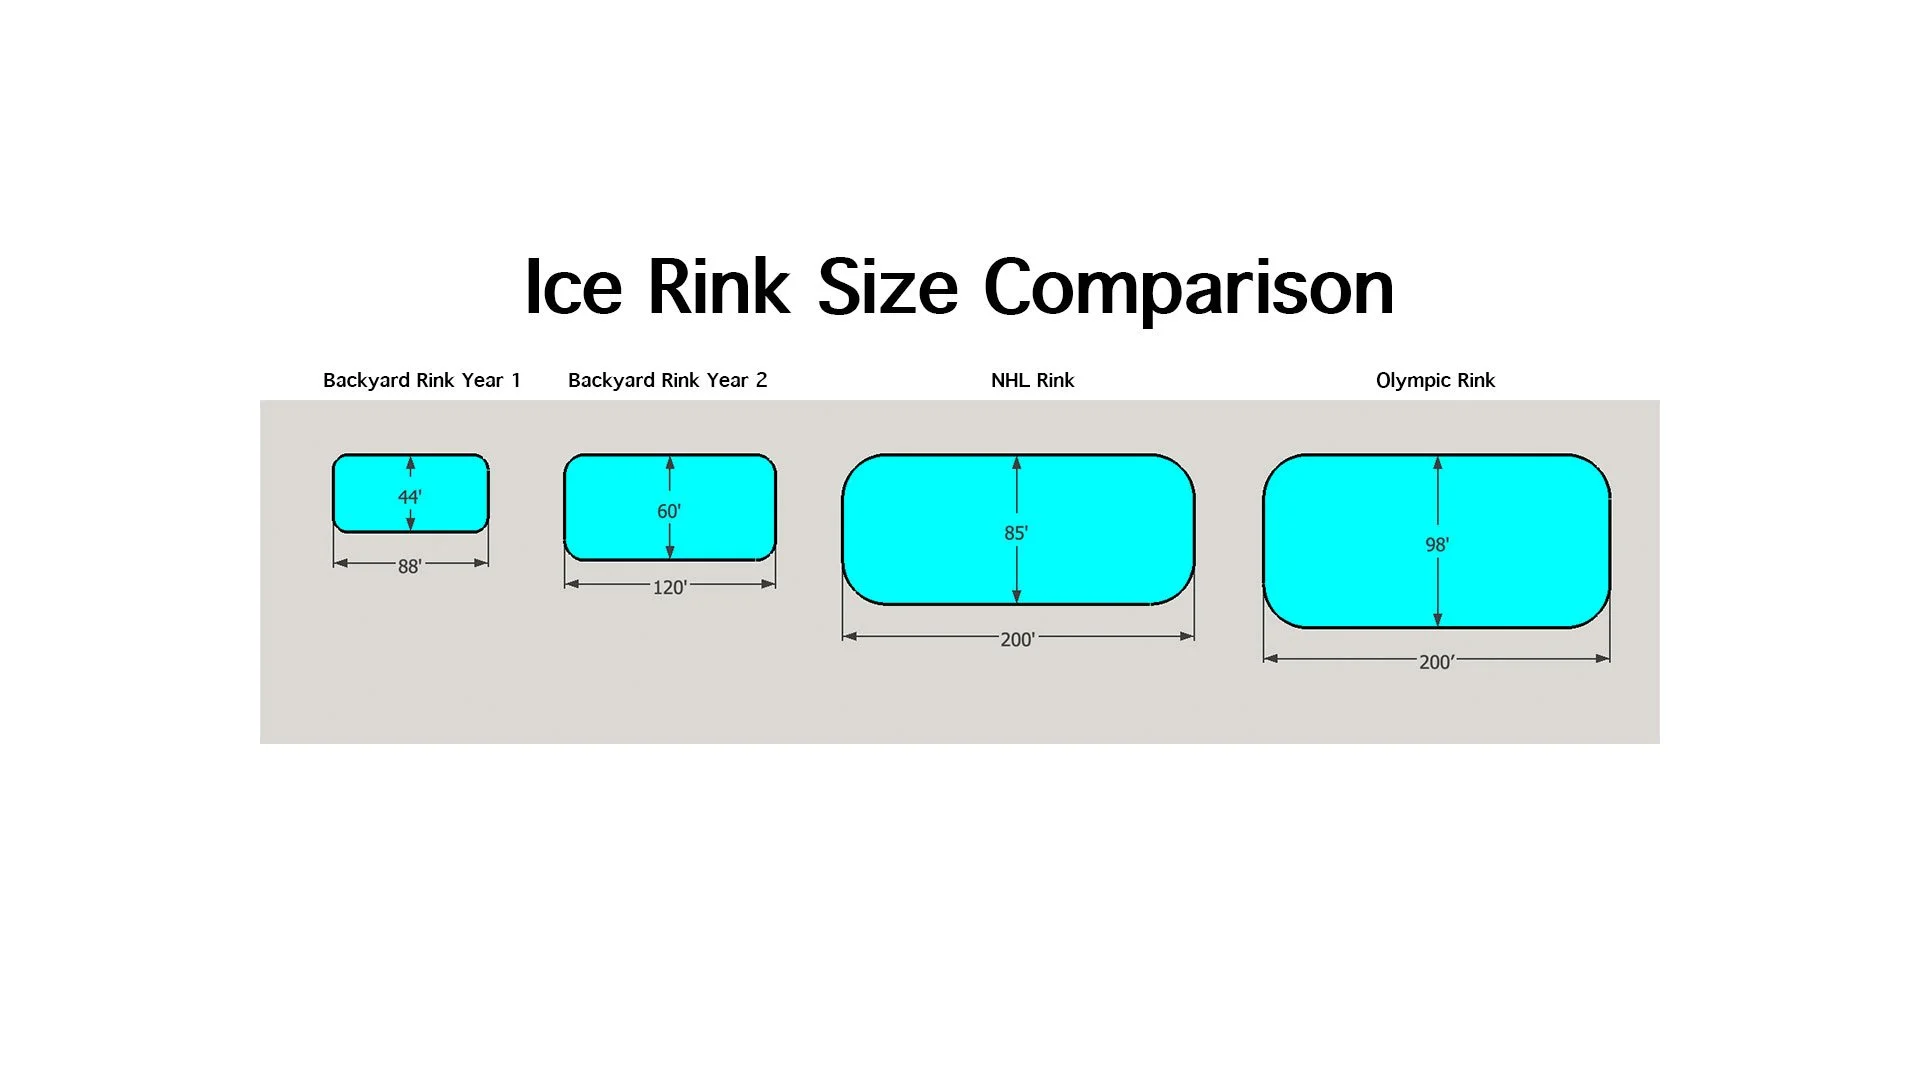
Step 3: Choosing the Right Rink Size
Bigger isn’t always better—trust me. I’ve built rinks as large as 120' x 60'. The last few years we have scaled down with young children and all the work that comes with the build. Our rink this year is 88’x44’ which has been a much more manageable size for our current lively hood.
Small Rinks (20x40, 30x50)
Quick to flood
Easier to maintain
Perfect for young kids
Medium Rinks (40x80, 44x88)
Ideal for hockey shooting, skating, and small games
Great for most backyards
Large Rinks (60x120+)
Amazing for full scrimmages
Require more water, maintenance, shoveling, and flooding
Whatever size you choose, remember: the best rink is the one you’ll actually enjoy maintaining all winter long.
Step 4: Installing the Boards and Brackets
I use NiceRink 4-foot boards—they’re durable, lightweight, and stack easily in the offseason for storage. There are other options for rink boards with EZRink, Yard Rink, and a complete DIY system to name a few. Research the best method for your rink setup. Here’s the process I follow with my NiceRink system:
How to install rink boards:
Run a string line along your spray-painted guide to keep boards straight.
Install corner boards first — This locks the shape into place.
Add brackets and rebar — These secure your boards and help handle water pressure, and for us—the wind.
Assemble the straight sections — Boards interlock with pegs and stake into the ground.
Double-check alignment — Make sure the boards follow your measured layout before moving on.
If you have friends or family around, this step goes way faster—and it’s surprisingly fun with help!
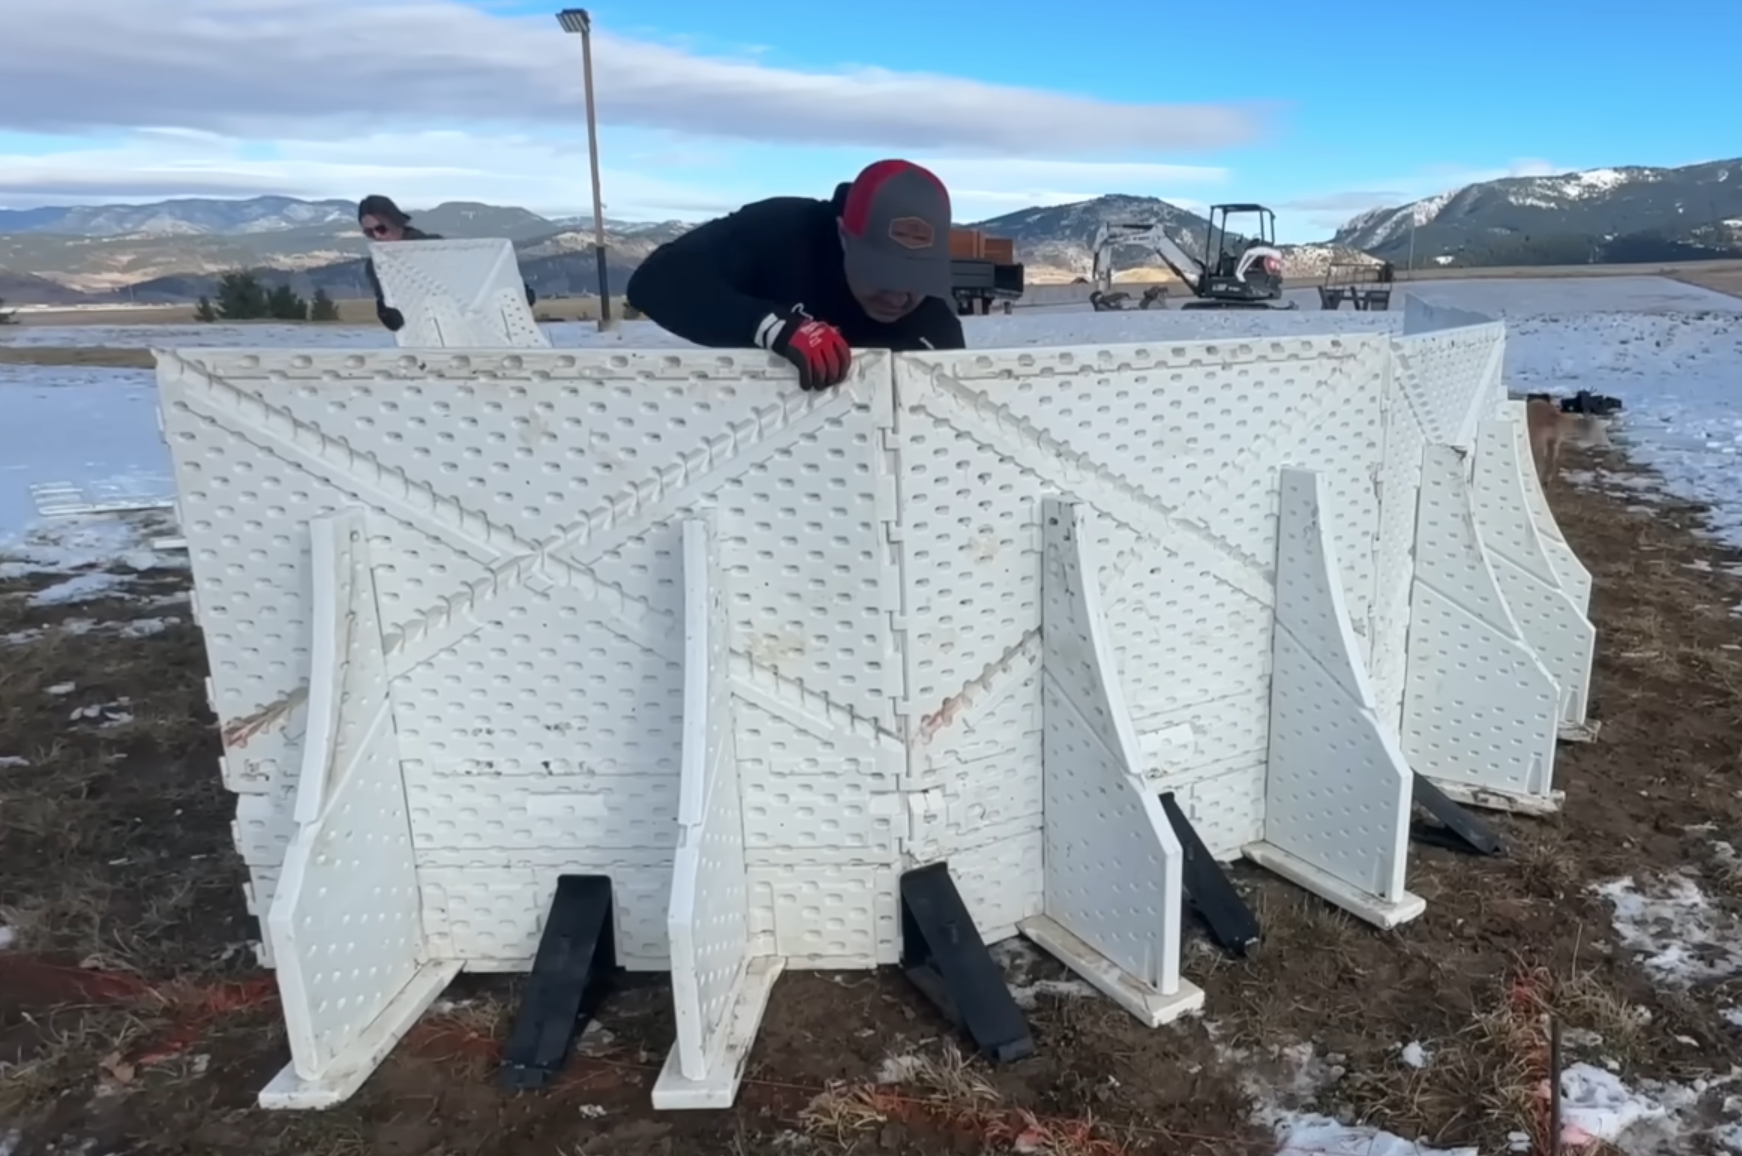
Installing the corner of our board system
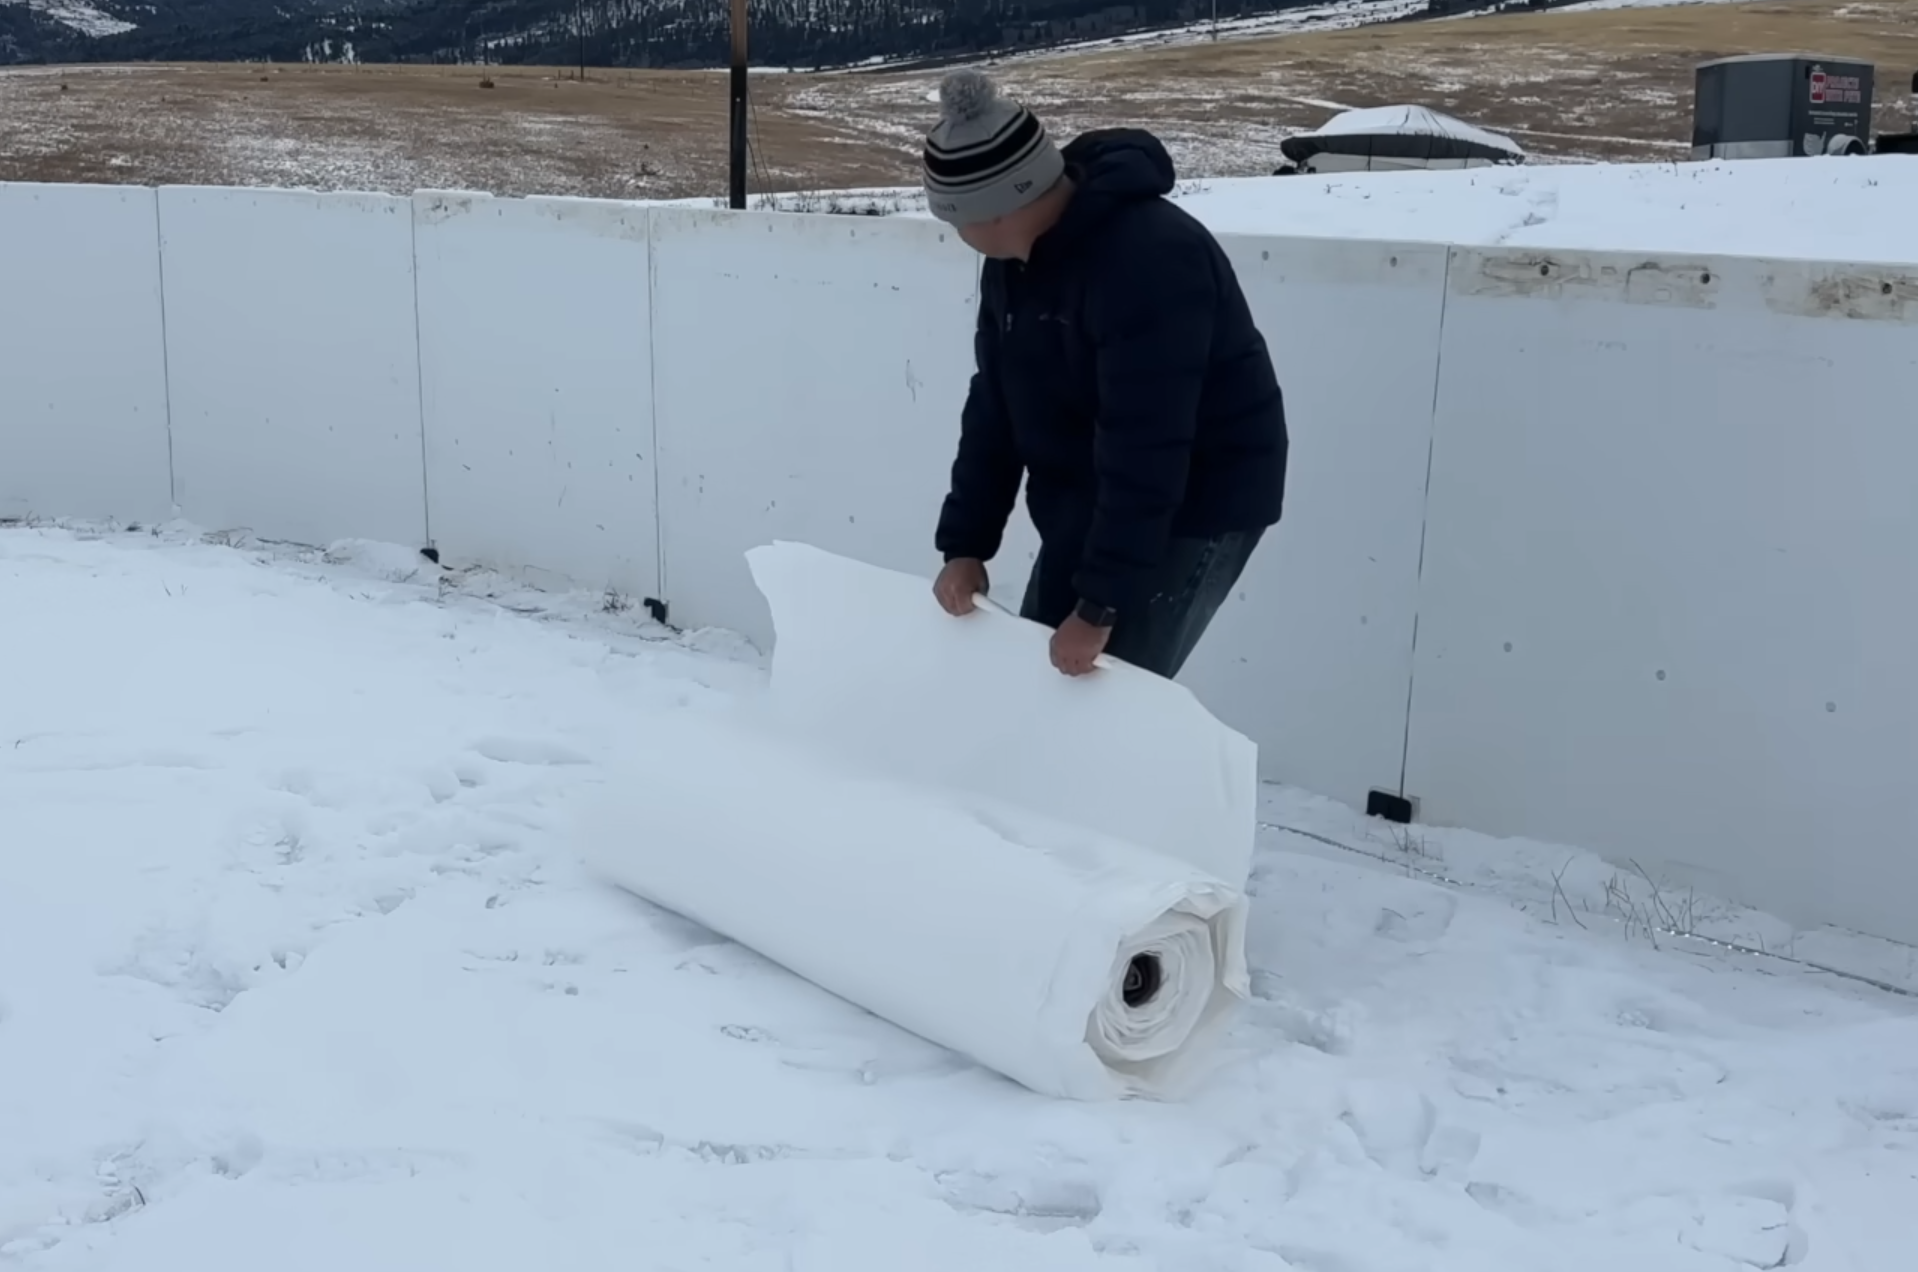
Step 5: Installing the Rink Liner
The liner is the heart of your rink. We try to order our liner way ahead of time so it is here and ready to roll when we get the perfect window of cold temps.
Tips for installing your liner:
Only install when you are ready to fill and 24–48 hours before freezing temperatures.
Spread the liner gently—don’t drag it over the ground
Let it “relax” in the sun so it flattens naturally
Make sure it extends well up the boards to avoid overflow or folding into rink.
Pro Tip: White liners keep the sun’s heat off your ice and dramatically improve freeze quality.
Step 6: Filling Your Rink
This step is all about timing.
When to fill:
Wait for consistent temperatures in the low 20s or below
Aim to fill the entire rink in one session
How to fill:
Use a garden hose or water truck
Let water settle naturally
Avoid walking on the liner during filling
A full freeze usually takes 3-5 days depending on temperatures. Be patient—good ice is worth the wait!
My son helping with the fill
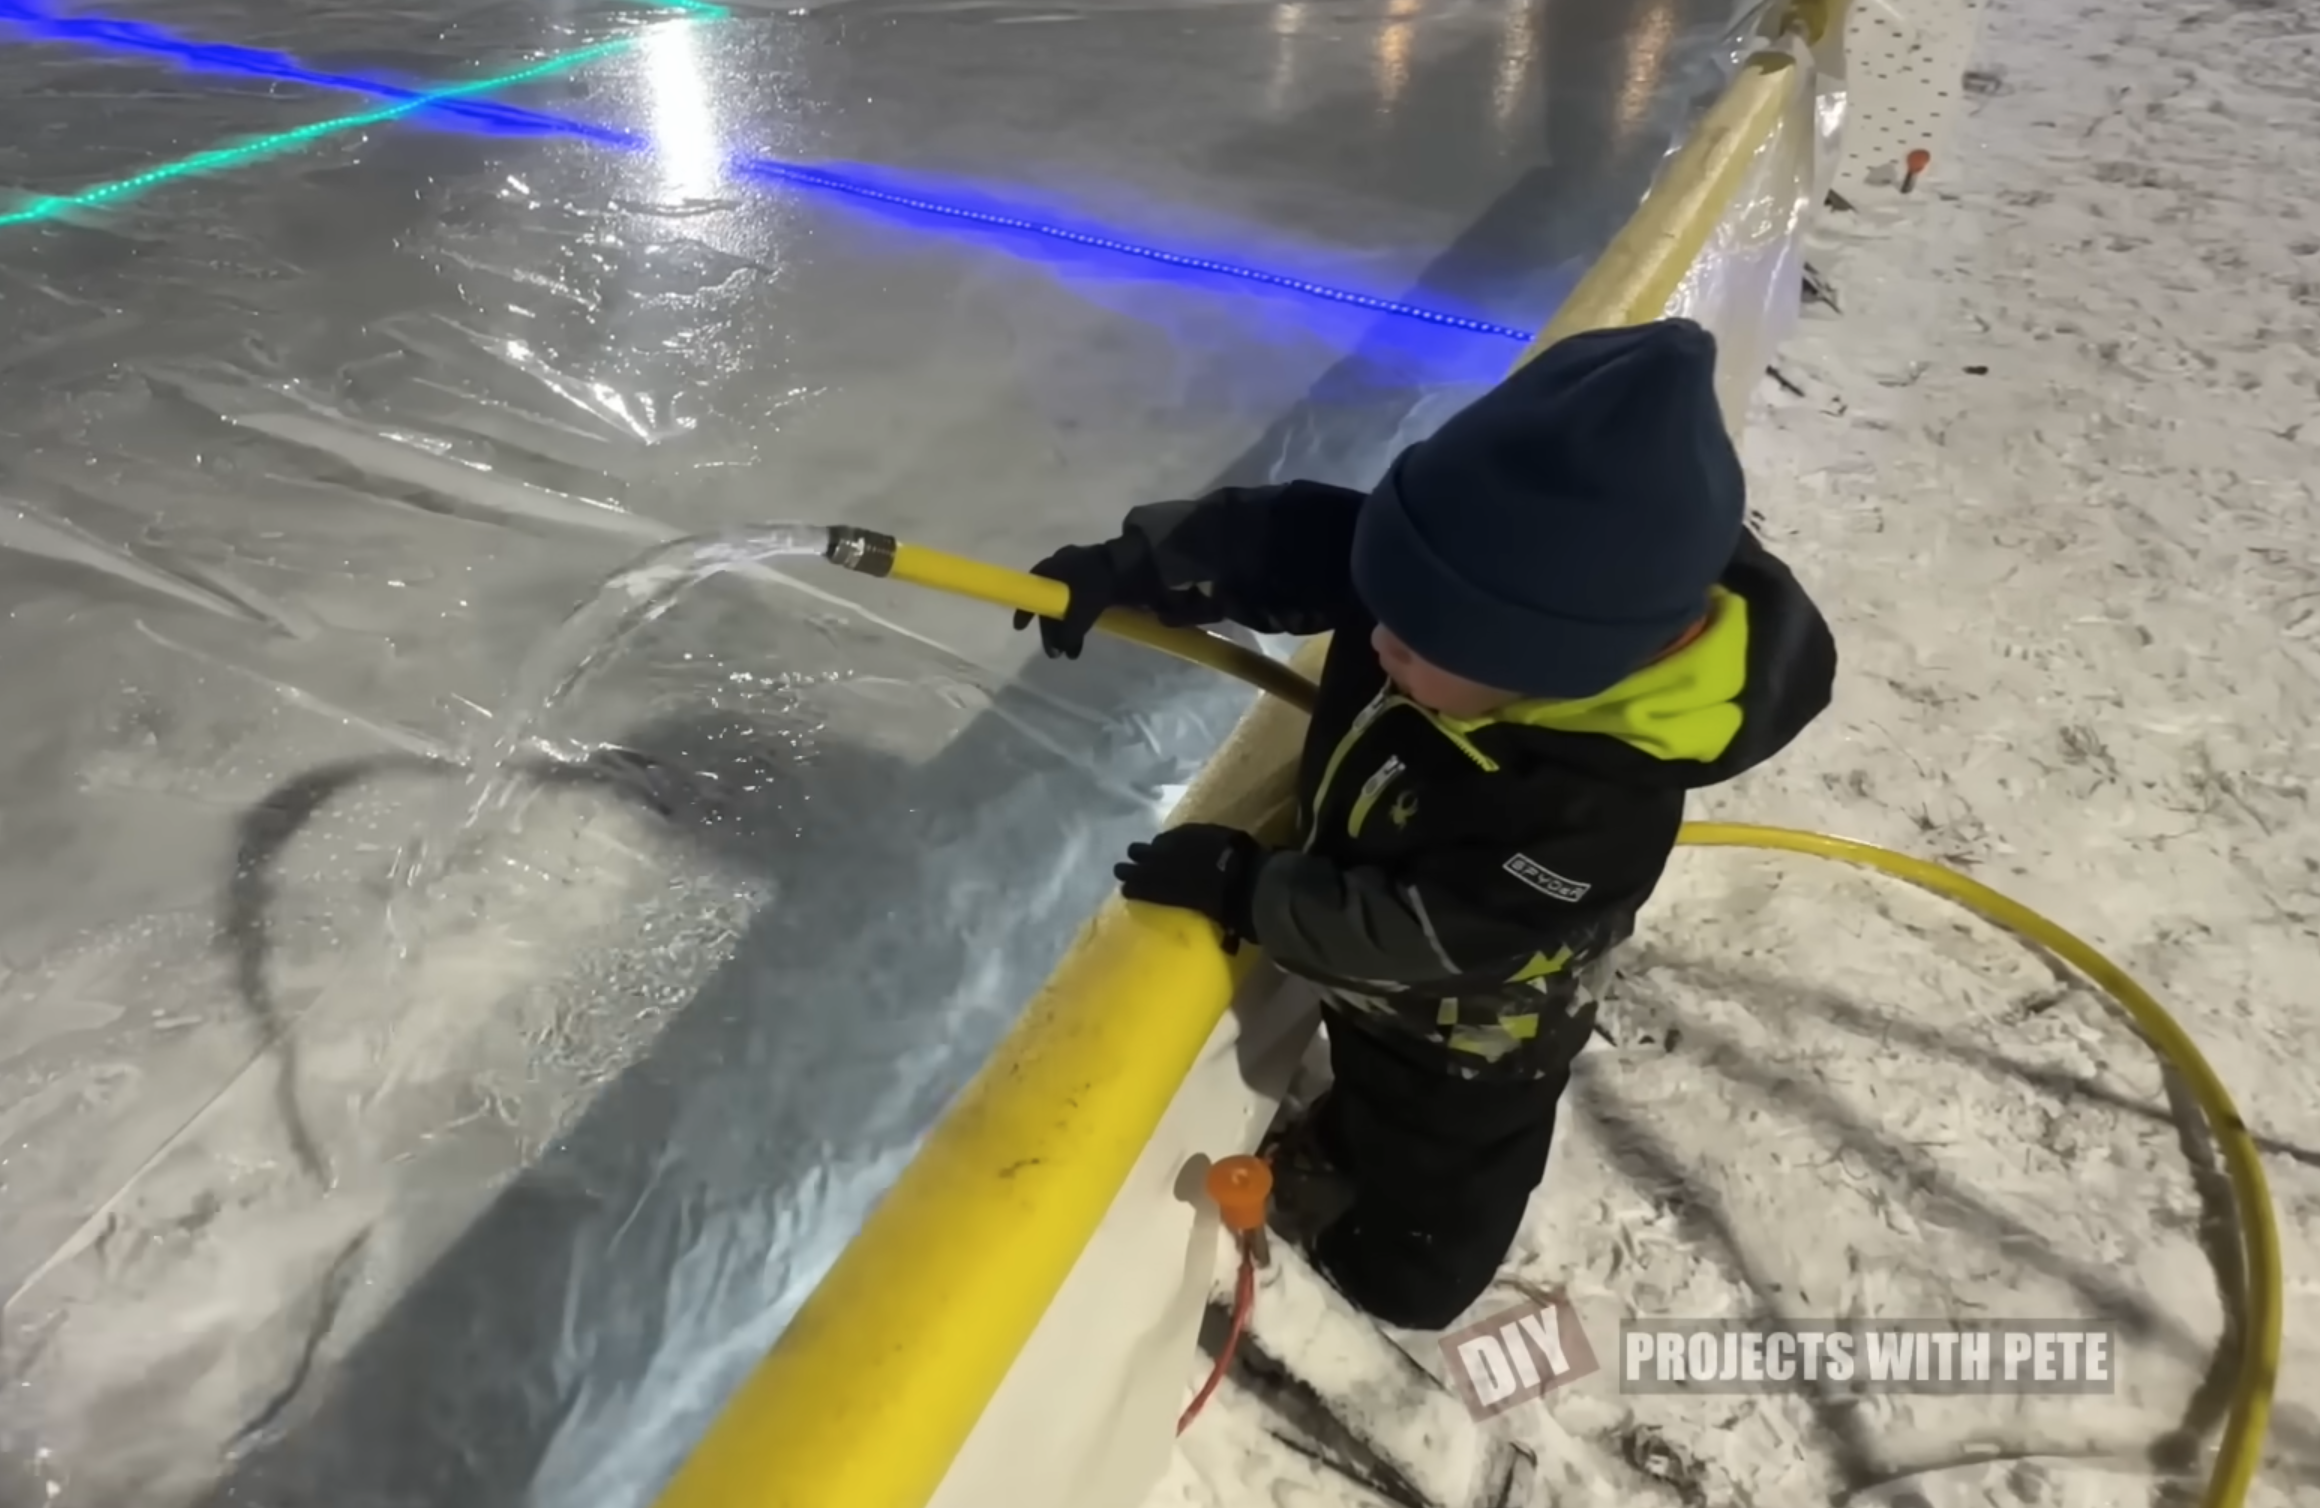
Step 7: Maintaining Your Ice All Season
Maintenance is the secret to great ice.
Daily/weekly tasks:
Shovel after every snowfall
Remove freeze ridges or bumps
Perform thin “ice resurfacing” to smooth the surface of ice
Avoid skating during warm spells to prevent damage
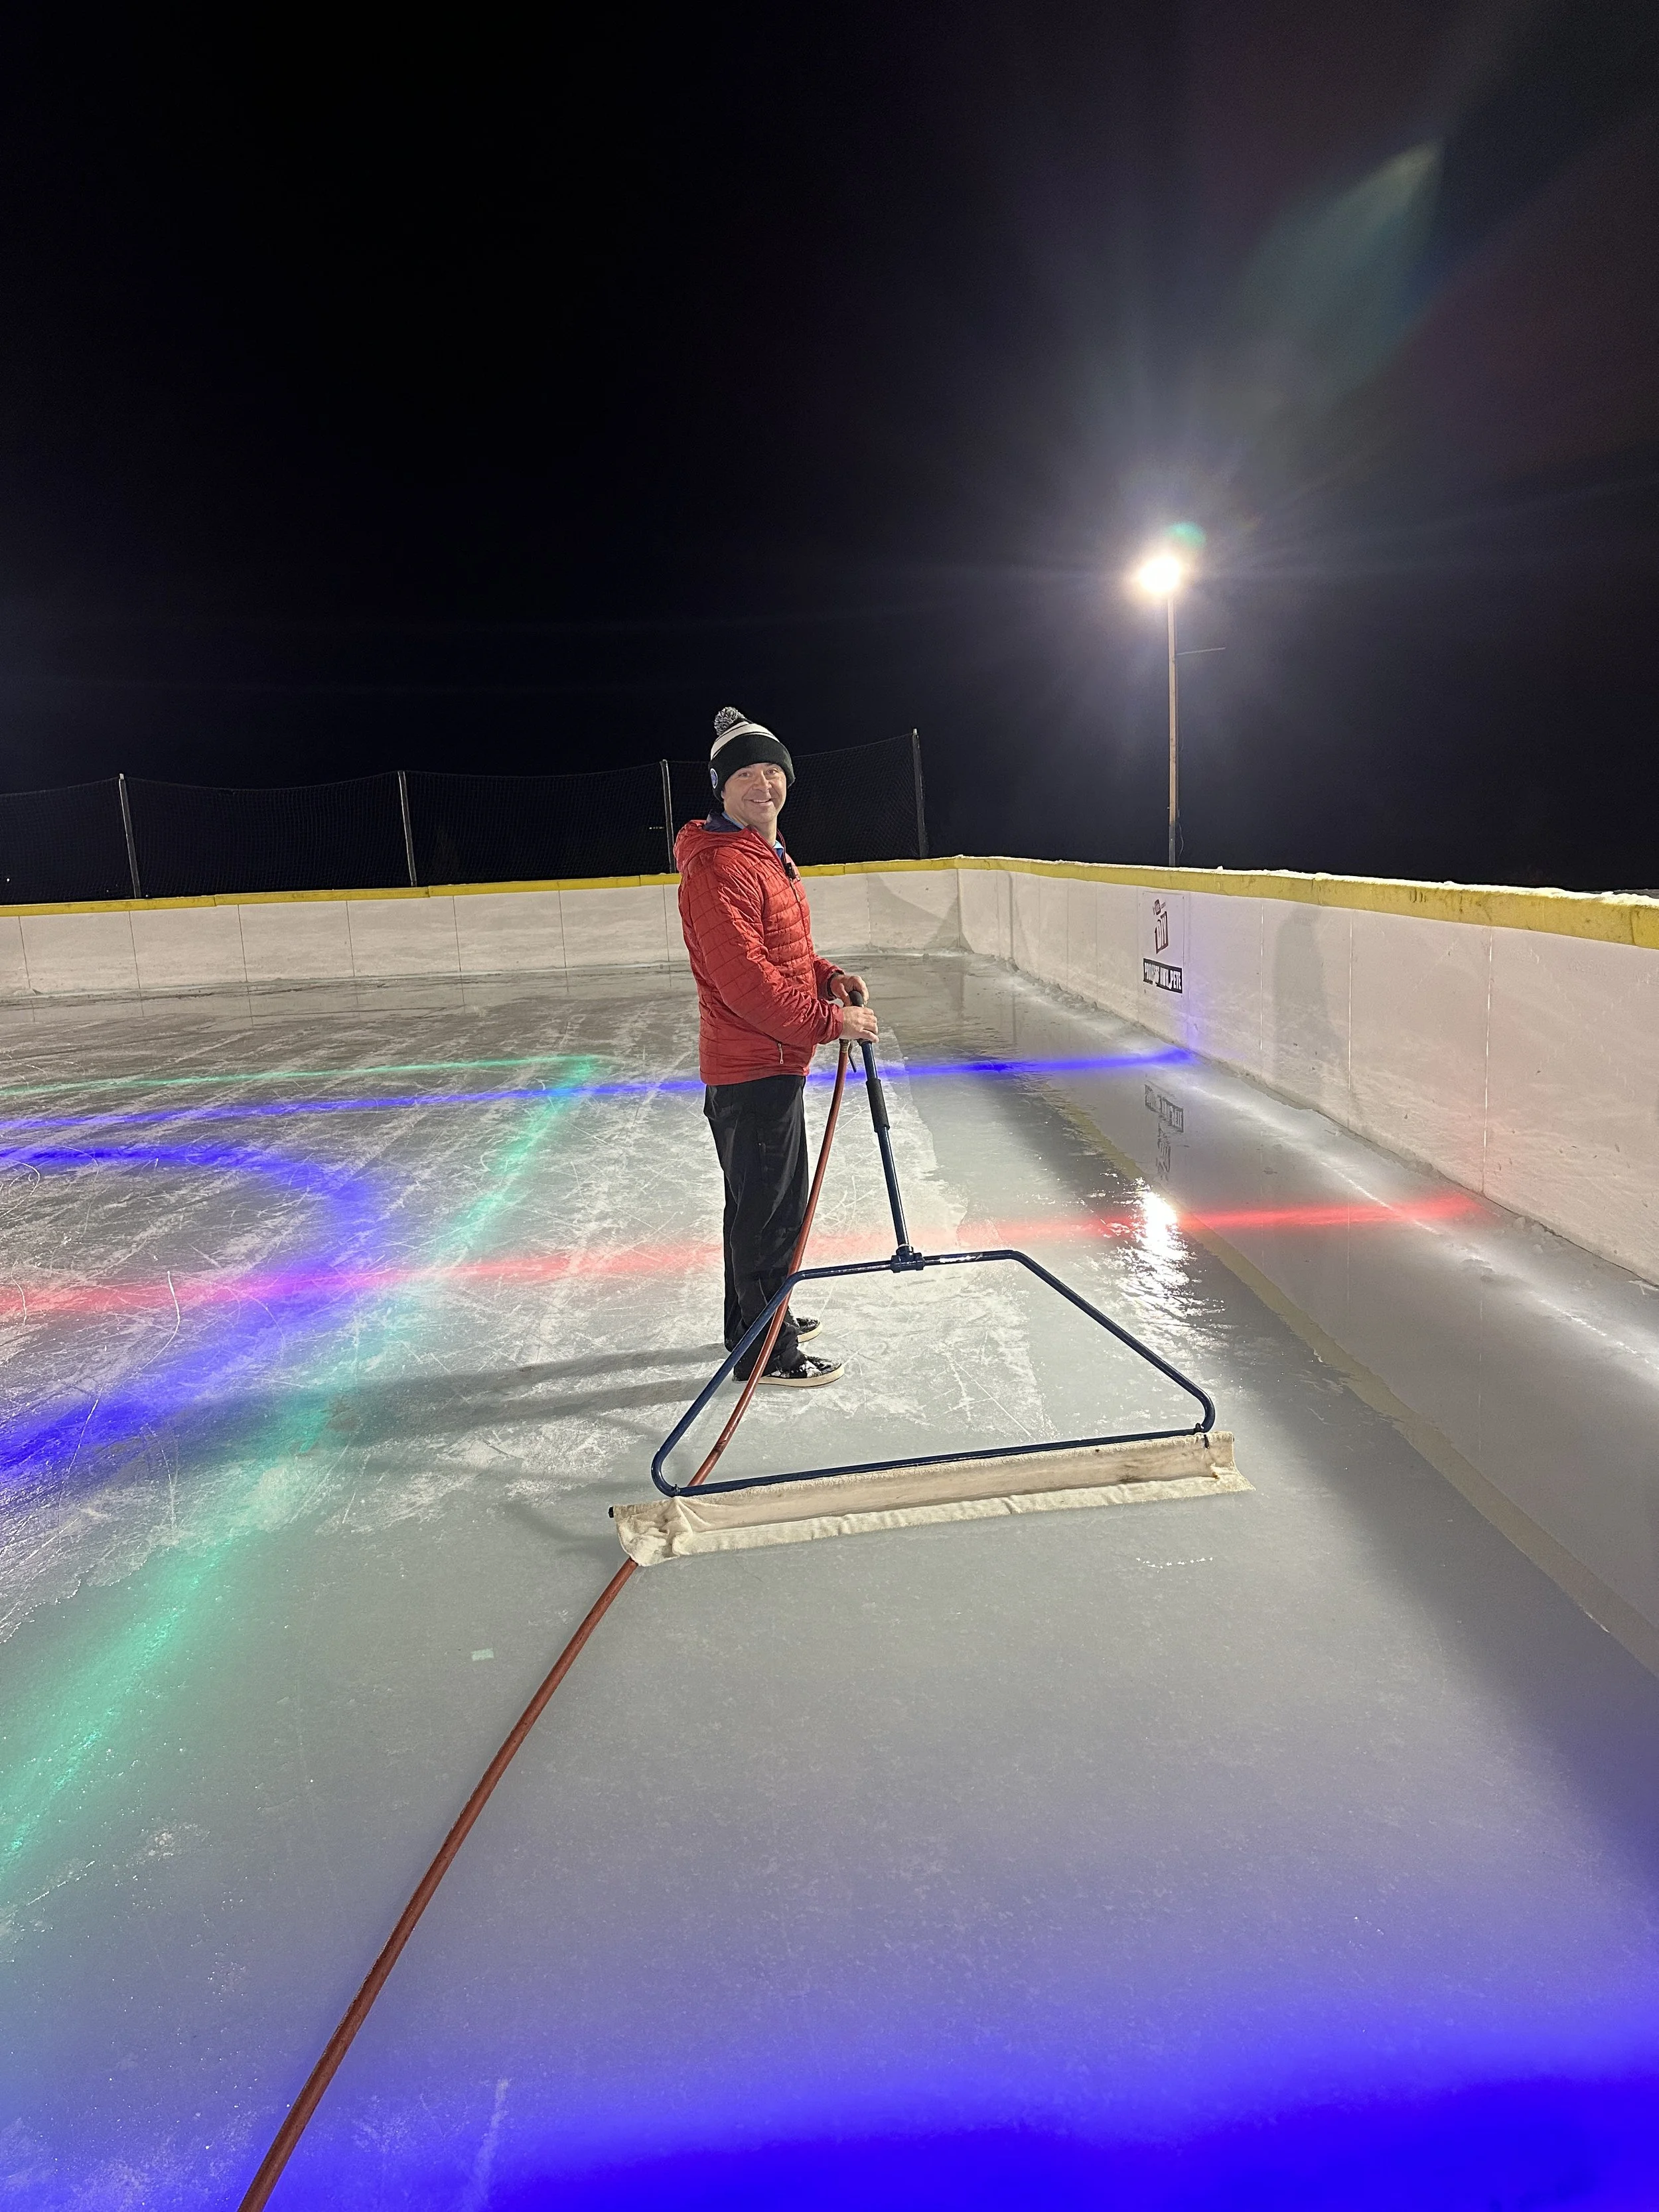
Resurfacing the rink after a skate.
Troubleshooting:
Soft spots: Chip away slush and apply a thin water layer
Cracks: Patch with snow and warm water and let freeze
Leaves: Remove immediately as this can can melt the ice in those areas
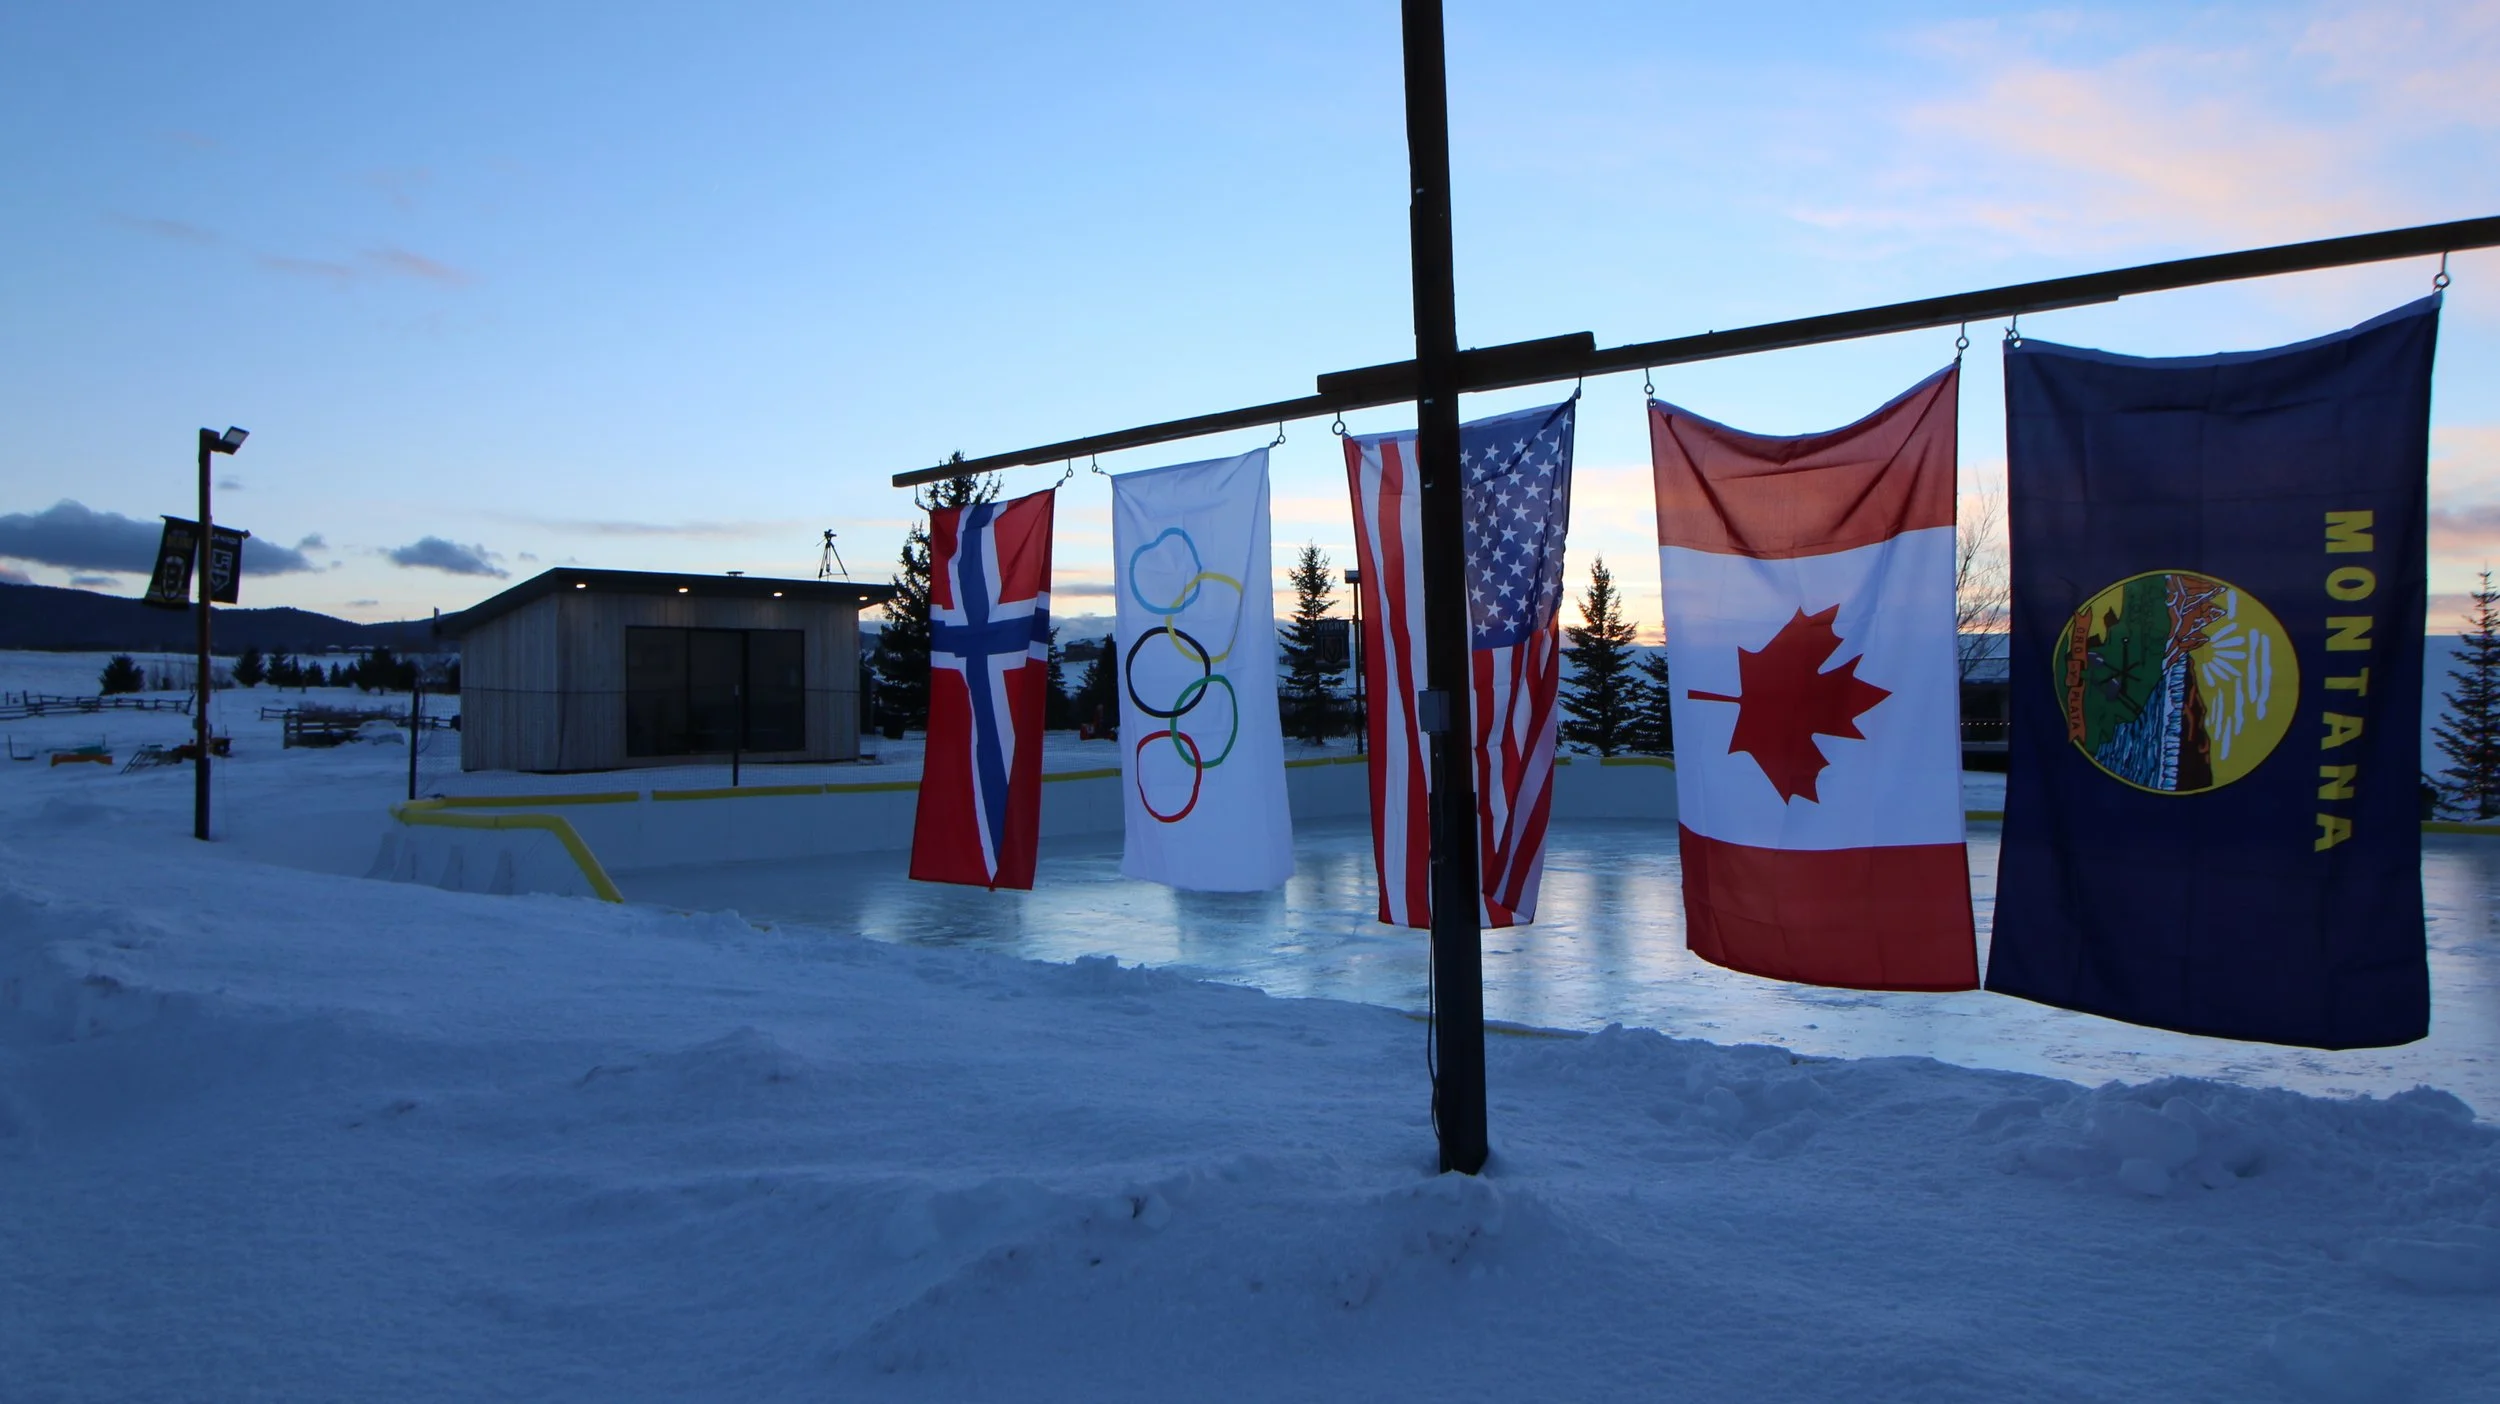
Step 8: Optional Upgrades (Make Your ODR Amazing)
Once the basics are done, you can add:
Under-ice LED lights
Seating and ‘warming’ area or building
Backstop netting
Custom rink signs
Flooding kits or resurfacing tools
Fire pit or hot cocoa station
These finishing touches bring the magic and memories to long winter nights.
Final Summary for Building a Backyard Rink
Pick and prepare your location
Level the area
Measure and square your rink
Install boards and brackets
Place liner and protect it
Fill when temps drop
Maintain ice throughout the season
NEXT enjoy the best part: skating with friends, making memories, and celebrating winter outdoors.
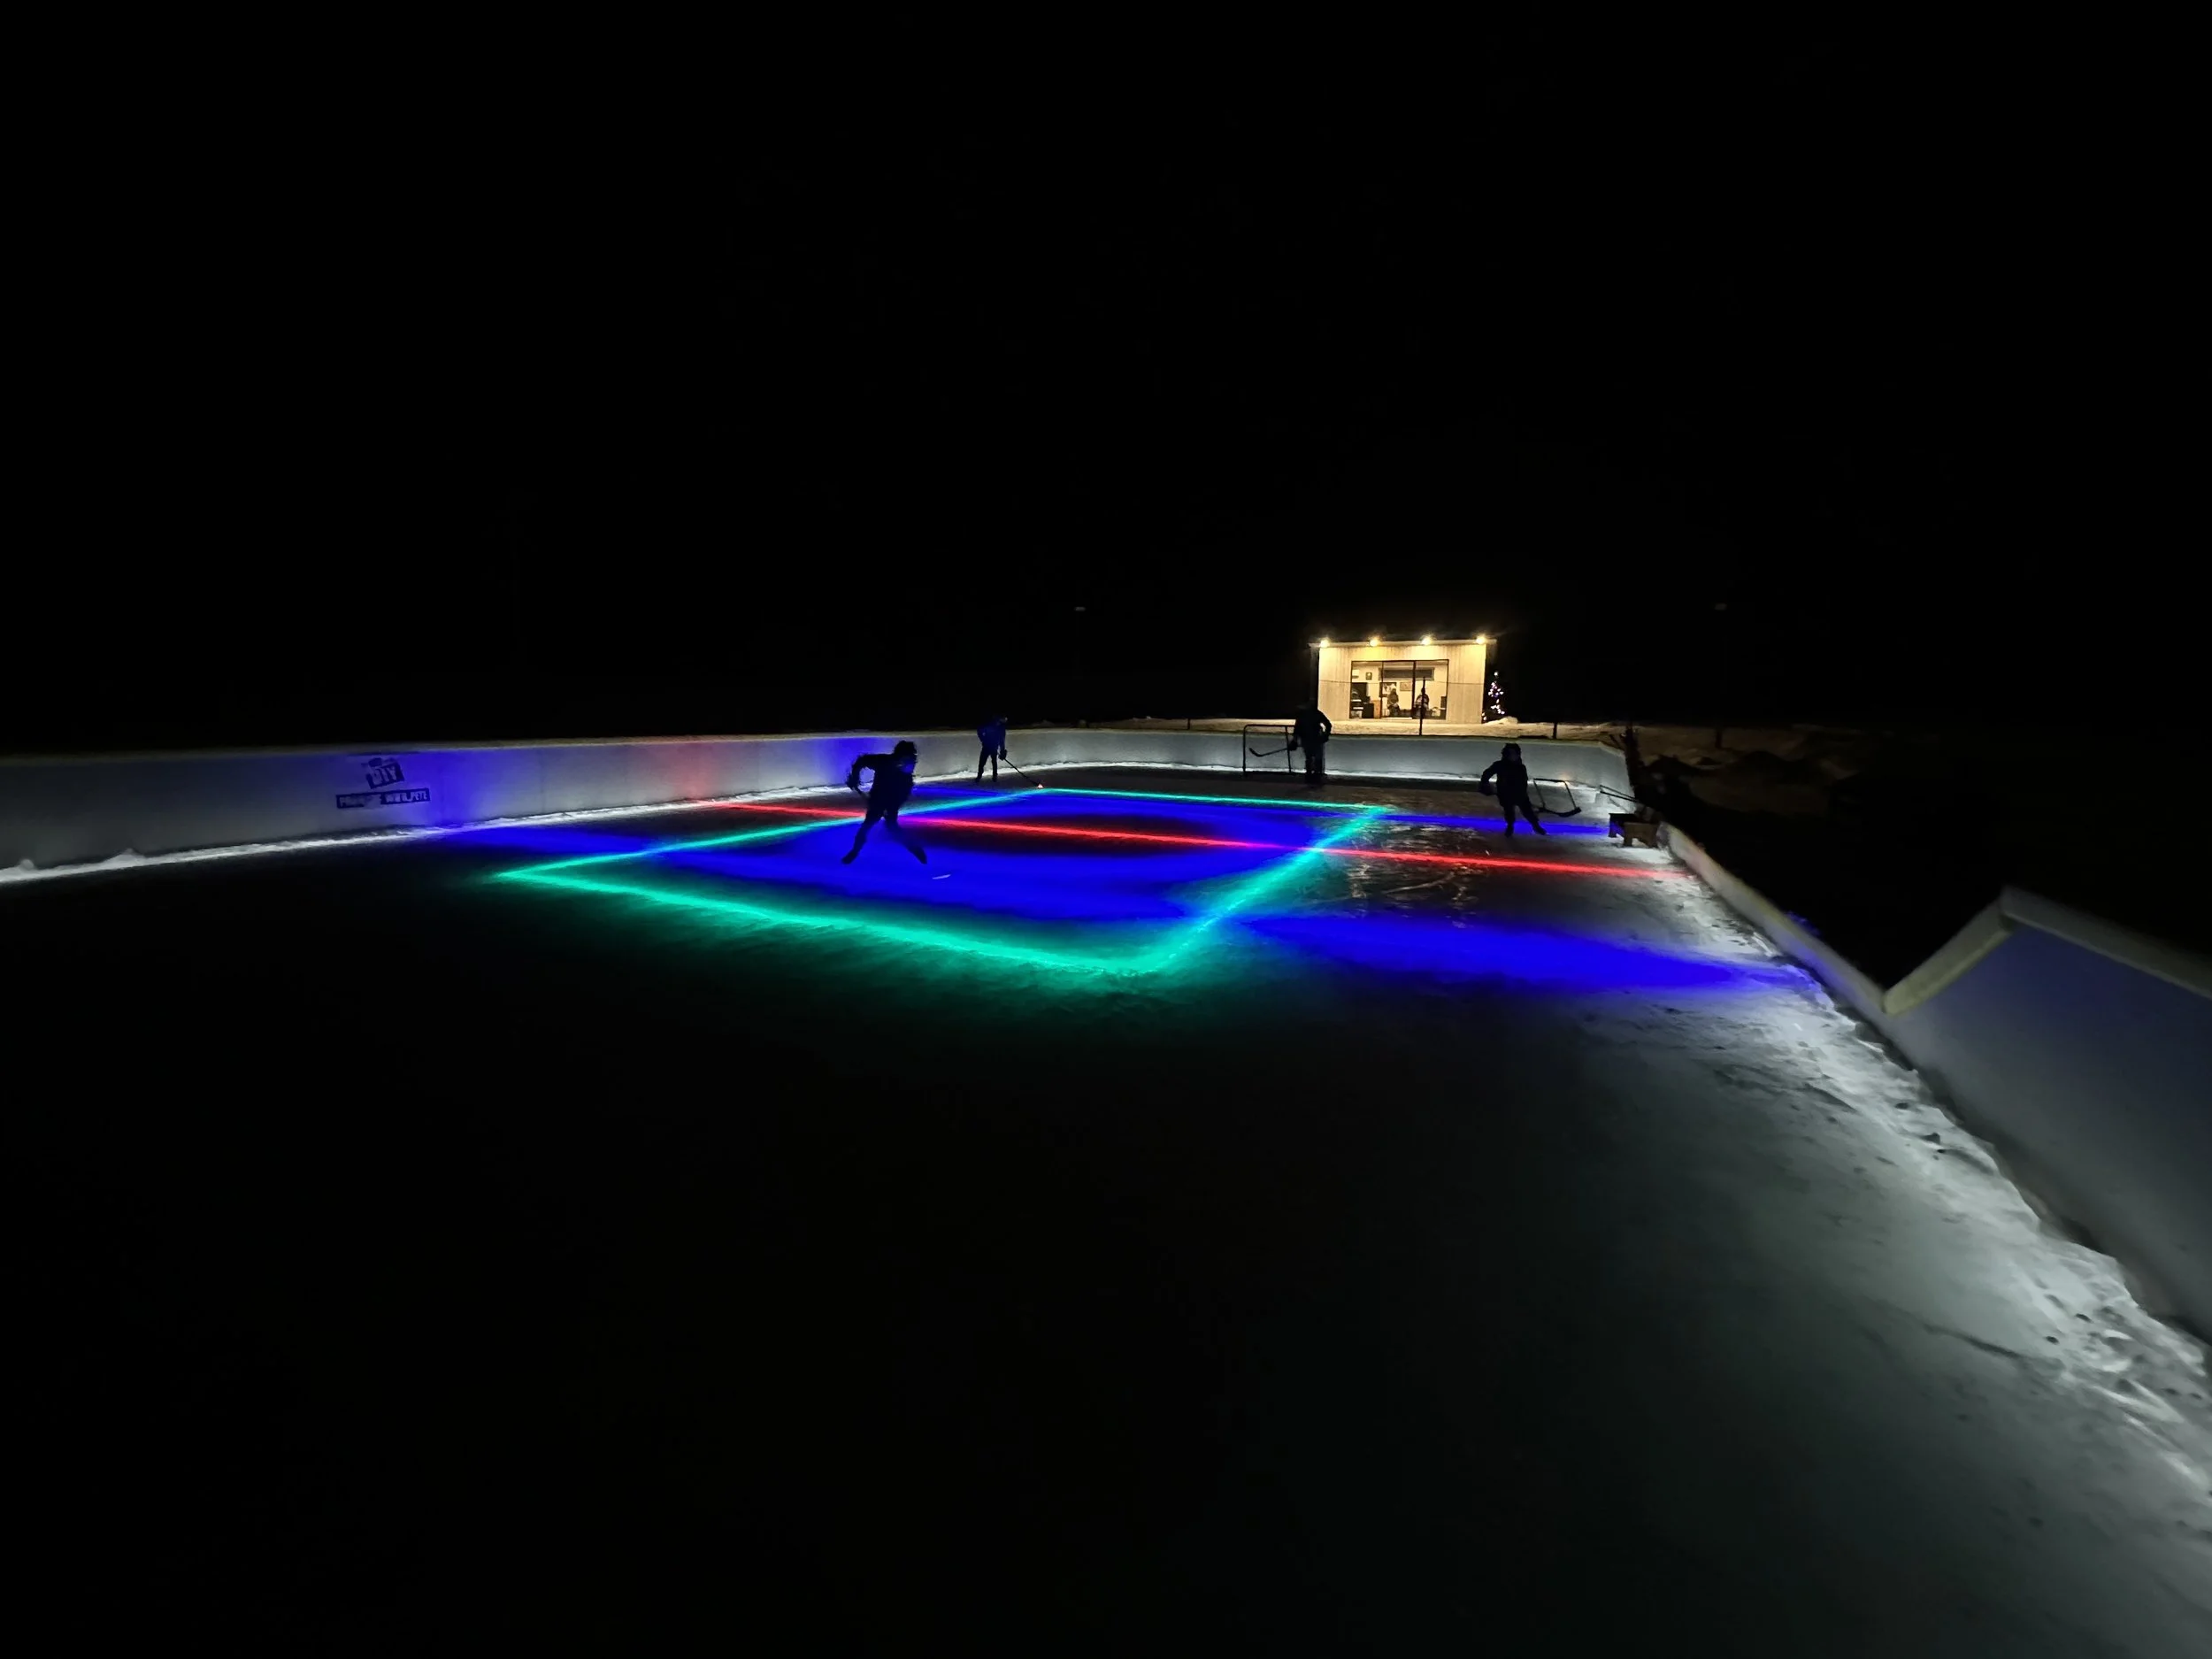
Hockey night on the O.D.R.
Ready to build your own O.D.R.?
Check out our Rink Build Checklist, browse our ODR videos, or join the Project O.D.R. community to share photos and get ideas from other rink builders. Want more content? Follow us throughout the O.D.R. season with our build @ProjectODR.